Purl and Seam

Fabric : Fibre : Family

DIY Dressform Pattern – feedback from the designer

February 14, 2019

As you know if you’ve been following my most recent posts, I contacted the designer of the DIY dressform pattern I used for Maud with some feedback regarding some niggles I found with the pattern.

This morning I received a reply from a member of the team over at Bootstrap .

Thank you so much for all your feedback, it really is extremely valuable.

Some these concerns have been brought to our attention and we just don’t have the time and team power to address them quite yet. 

We currently have an intensive push to work on our latest project, including our newest Tailornova technology, so that’s where all our time and attention is going. We are still a small start up, so we will be able to refine our dress form pattern in a few months when we have more time. 

I will forward your email to our IT team and pattern maker who can make all the corrections. 

So there you go. Hopefully the tweaks will be made in the not too distant future. But in the meantime, the pattern is perfectly workable to make a good fitted cover for your dressform.

LABELS ~ Sewing

SHARE >>

DIY Dressform Cover – The Reveal

February 12, 2019

This is the moment we’ve all been waiting for….Maud’s new custom cover is fitted and stuffed.

This has been such an adventure. Both because this was the sewing of something completely alien to me, which stretched (pun intended) my sewing skill set, but also in terms of body confidence and acceptance. I think I need to ponder on that a bit more and revisit it in a separate post.

But for today I’m going to talk about the final stage – stuffing Maud’s cover to look like me.

VIEW POST

LABELS ~ Sewing

SHARE >>

DIY Dressform Cover – Part Two

February 1, 2019

If you’re of a nervous disposition I suggest you go and find photos of kittens and cake on Instagram, and come back when I’ve finished this series. Closeup photos of my embonpoint* to follow!

Ok…I got to try on the Maud cover just before Dave and Summer headed out for karate last night, and my first thought was that the fit was really, really wrong. I know that I’m 52 and gravity it working its magic, but the bust line on this was way out!

VIEW POST

LABELS ~ Sewing

SHARE >>

DIY Dressform Cover – Part One

January 29, 2019

Hello! I do hope you’re all keeping warm. Unless you’re in Australia, then keeping cool! As I’m typing this there is snow drifting past the window and actually starting to stick. The small peeps will be beside themselves.

VIEW POST

LABELS ~ Sewing

SHARE >>

Newlook 6217 – my first TNT

April 14, 2018

This post is so overdue it’s ridiculous.  And it’s all been hanging on photographs!  Yesterday Summer agreed to take a couple of quick snaps as I was wearing my favourite of these tops, so here we go, at last.

I’ve already covered the fitting changes I made to this pattern here and, I’ll be honest, I’m still wearing that top on a regular basis, despite it’s imperfections.  It fits better than pretty much anything I’ve bought from a shop and is great to throw on when I’m running around the house with a pair of jeans doing chores.

I have, however, since then made 4 other versions, with varying degrees of success.  The success or failure of the finished garment has been purely down to fabric choice.

First up my favourite. This is a lovely sheer, lightweight cotton that has almost a cheesecloth texture to it.  The print is delicious, and it’s cool and lovely to wear as we head into warmer weather, but also a great layering piece with a cardigan for us women-of-a-certain-age!

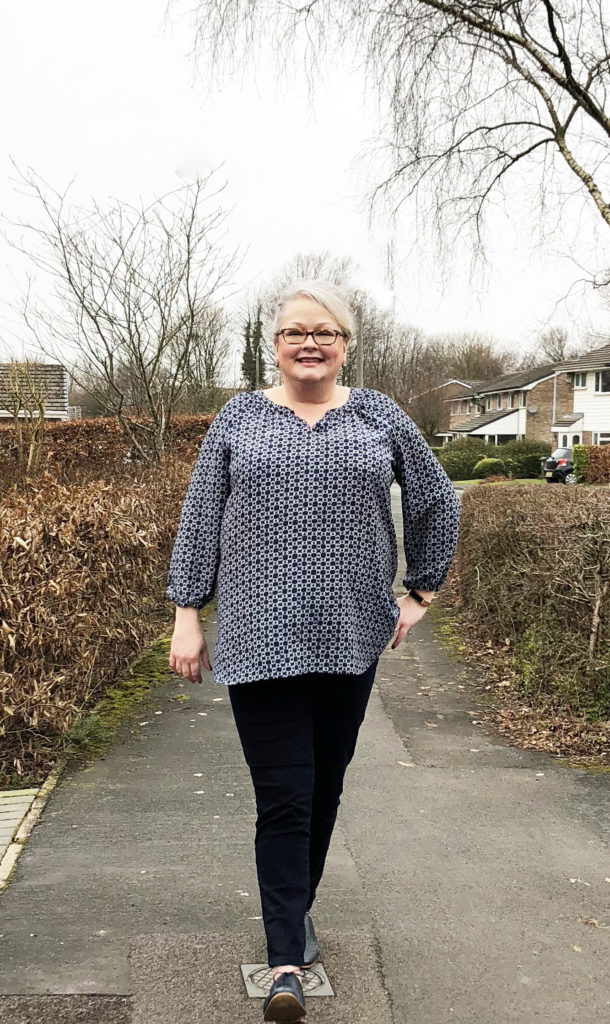
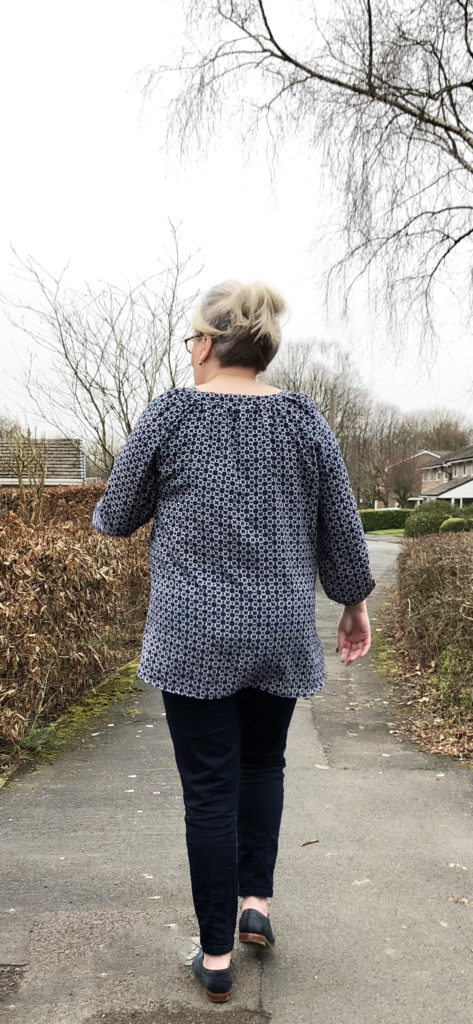
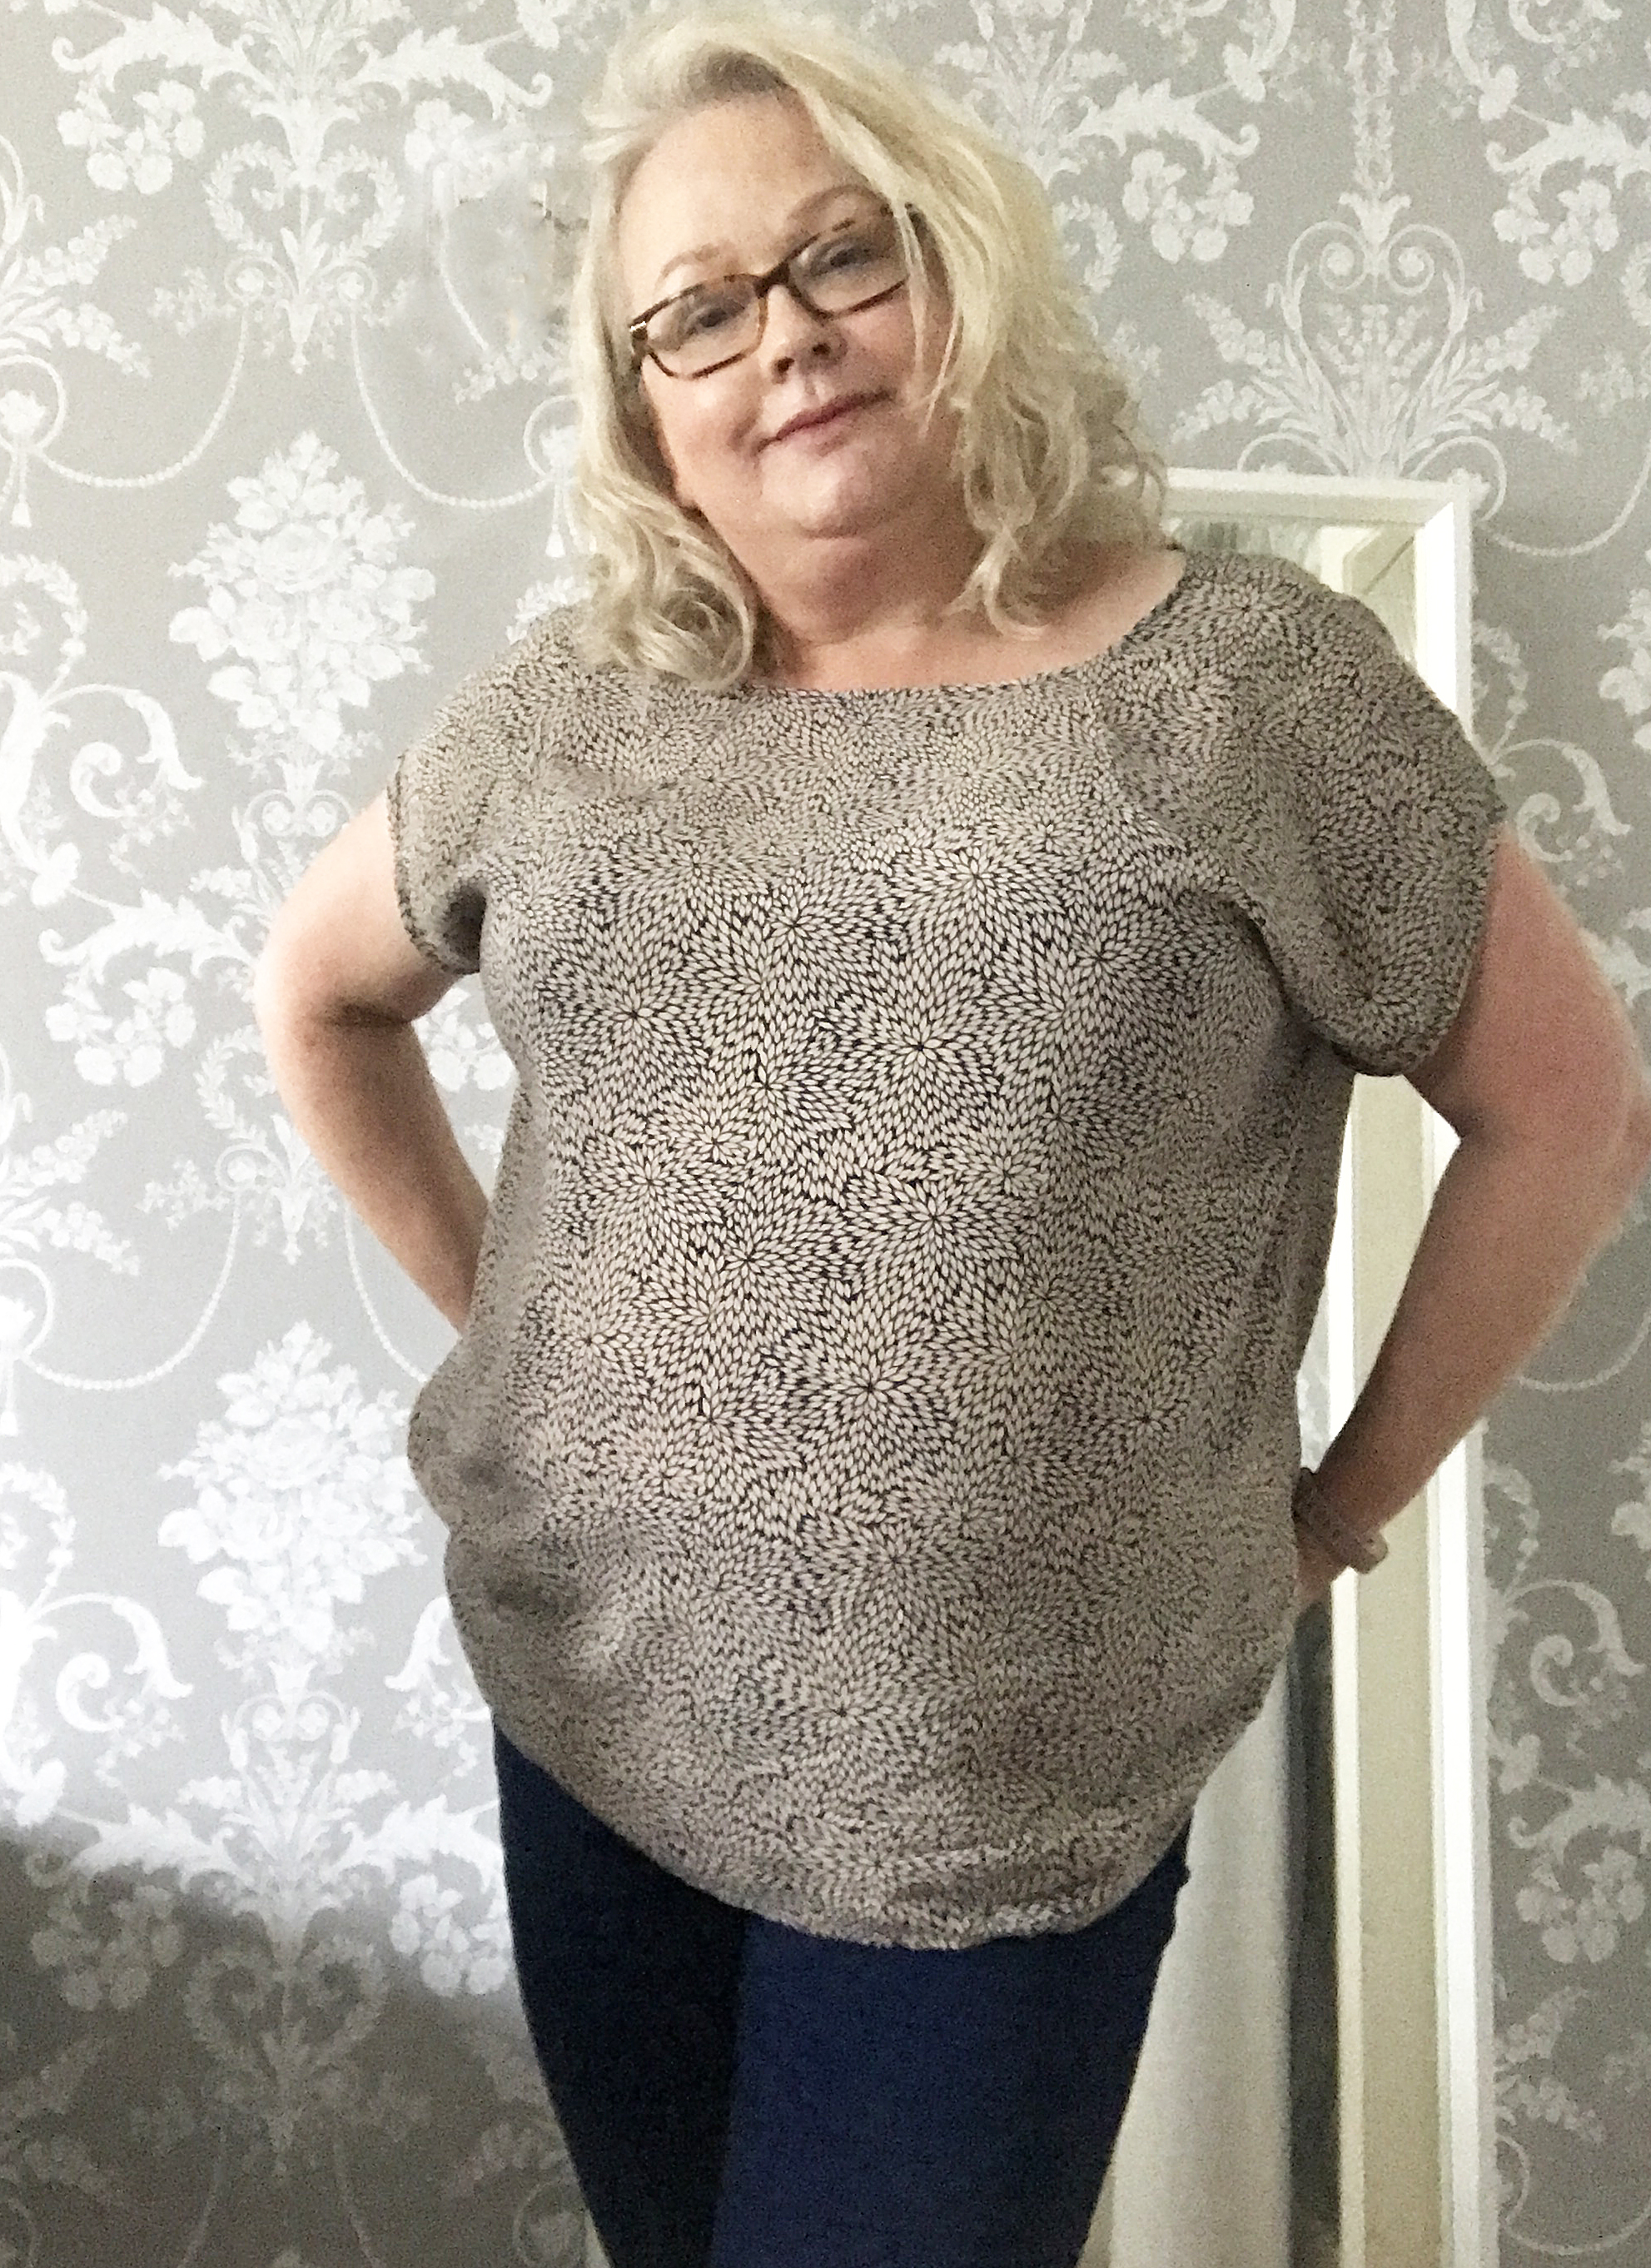
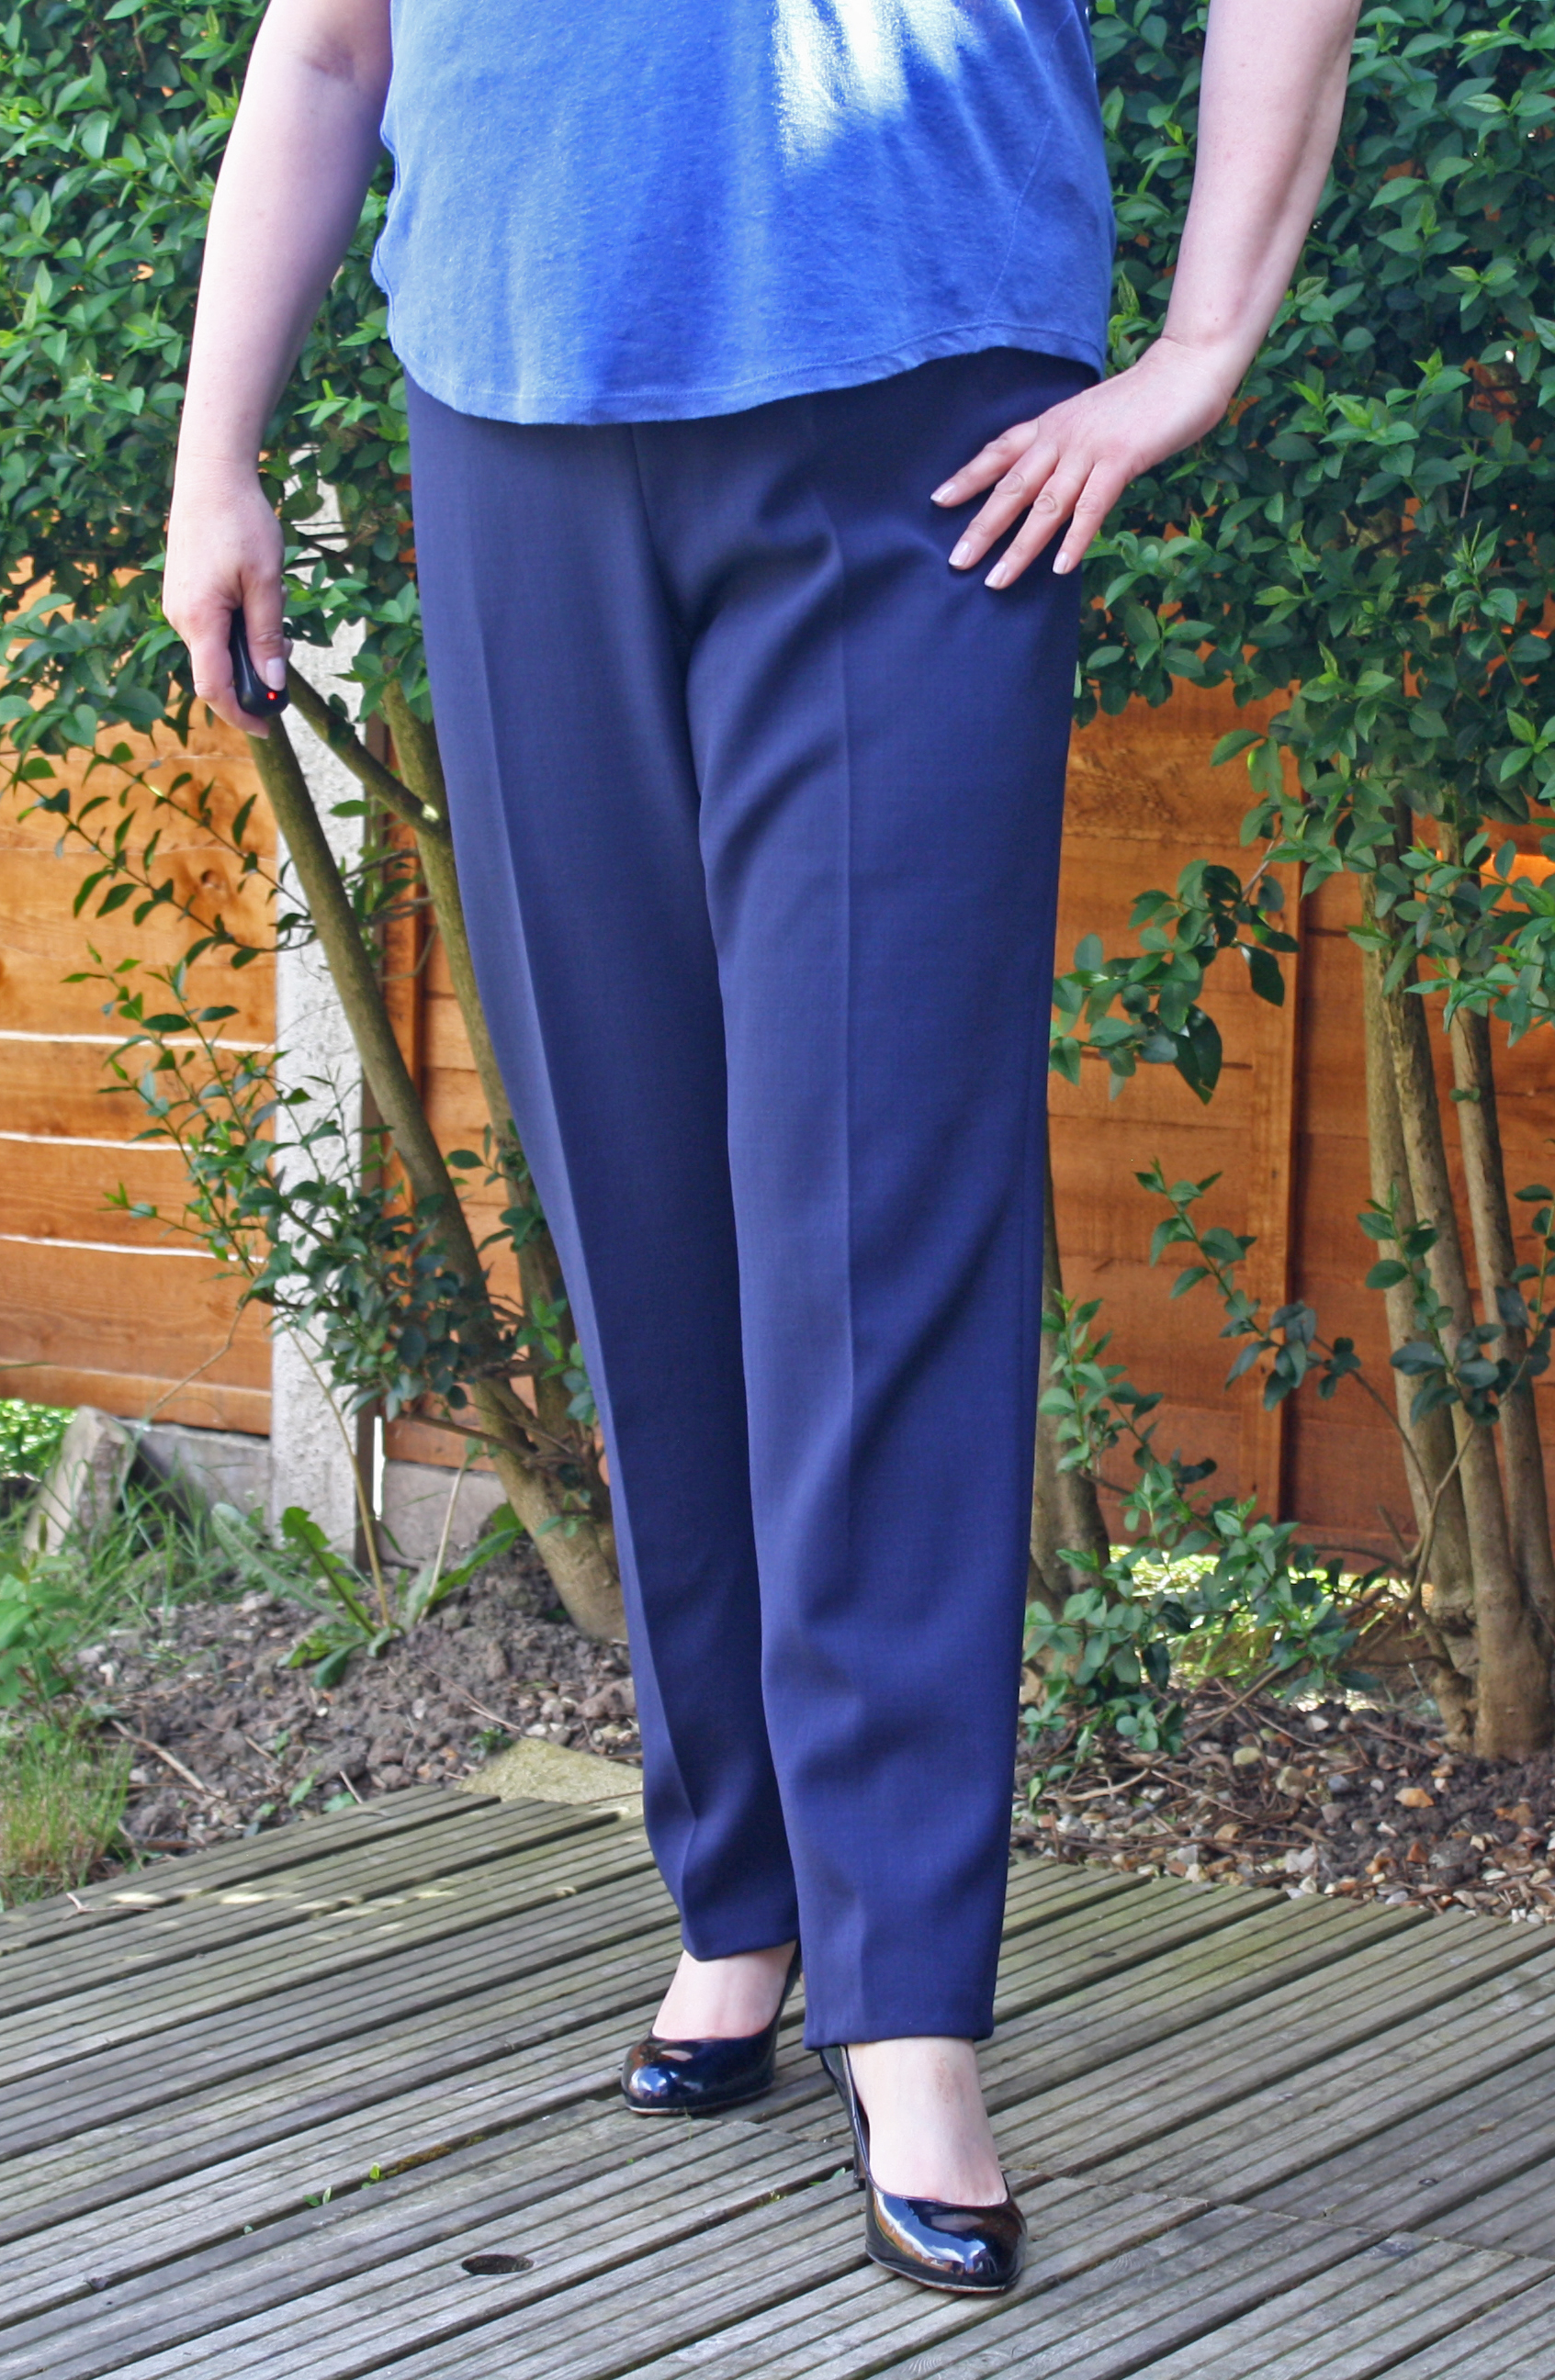
The fabric is from deep stash and was gifted to me by my friend Christian, who is a seamstress with impeccable taste!  I’m glad I’ve finally got this one in my wardrobe and its in heavy rotation.

Second favourite is another fabric from deep stash, which I purchased yonks ago from Abakhan.  it’s a printed cotton jersey, and it’s my favourite for when I just need something comfy for dog walking or housework.  Love this top and it proves that this pattern is great for knits as well as wovens.

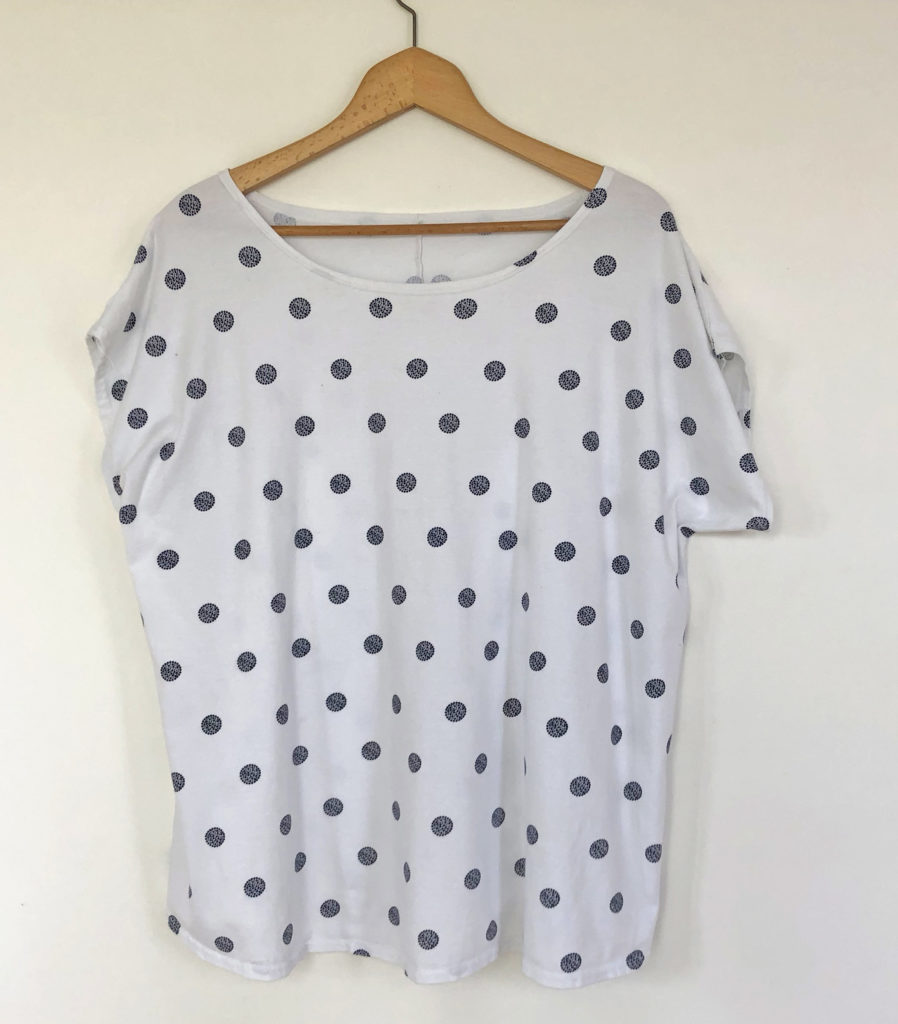
The first of the unsuccessful tops is this one.

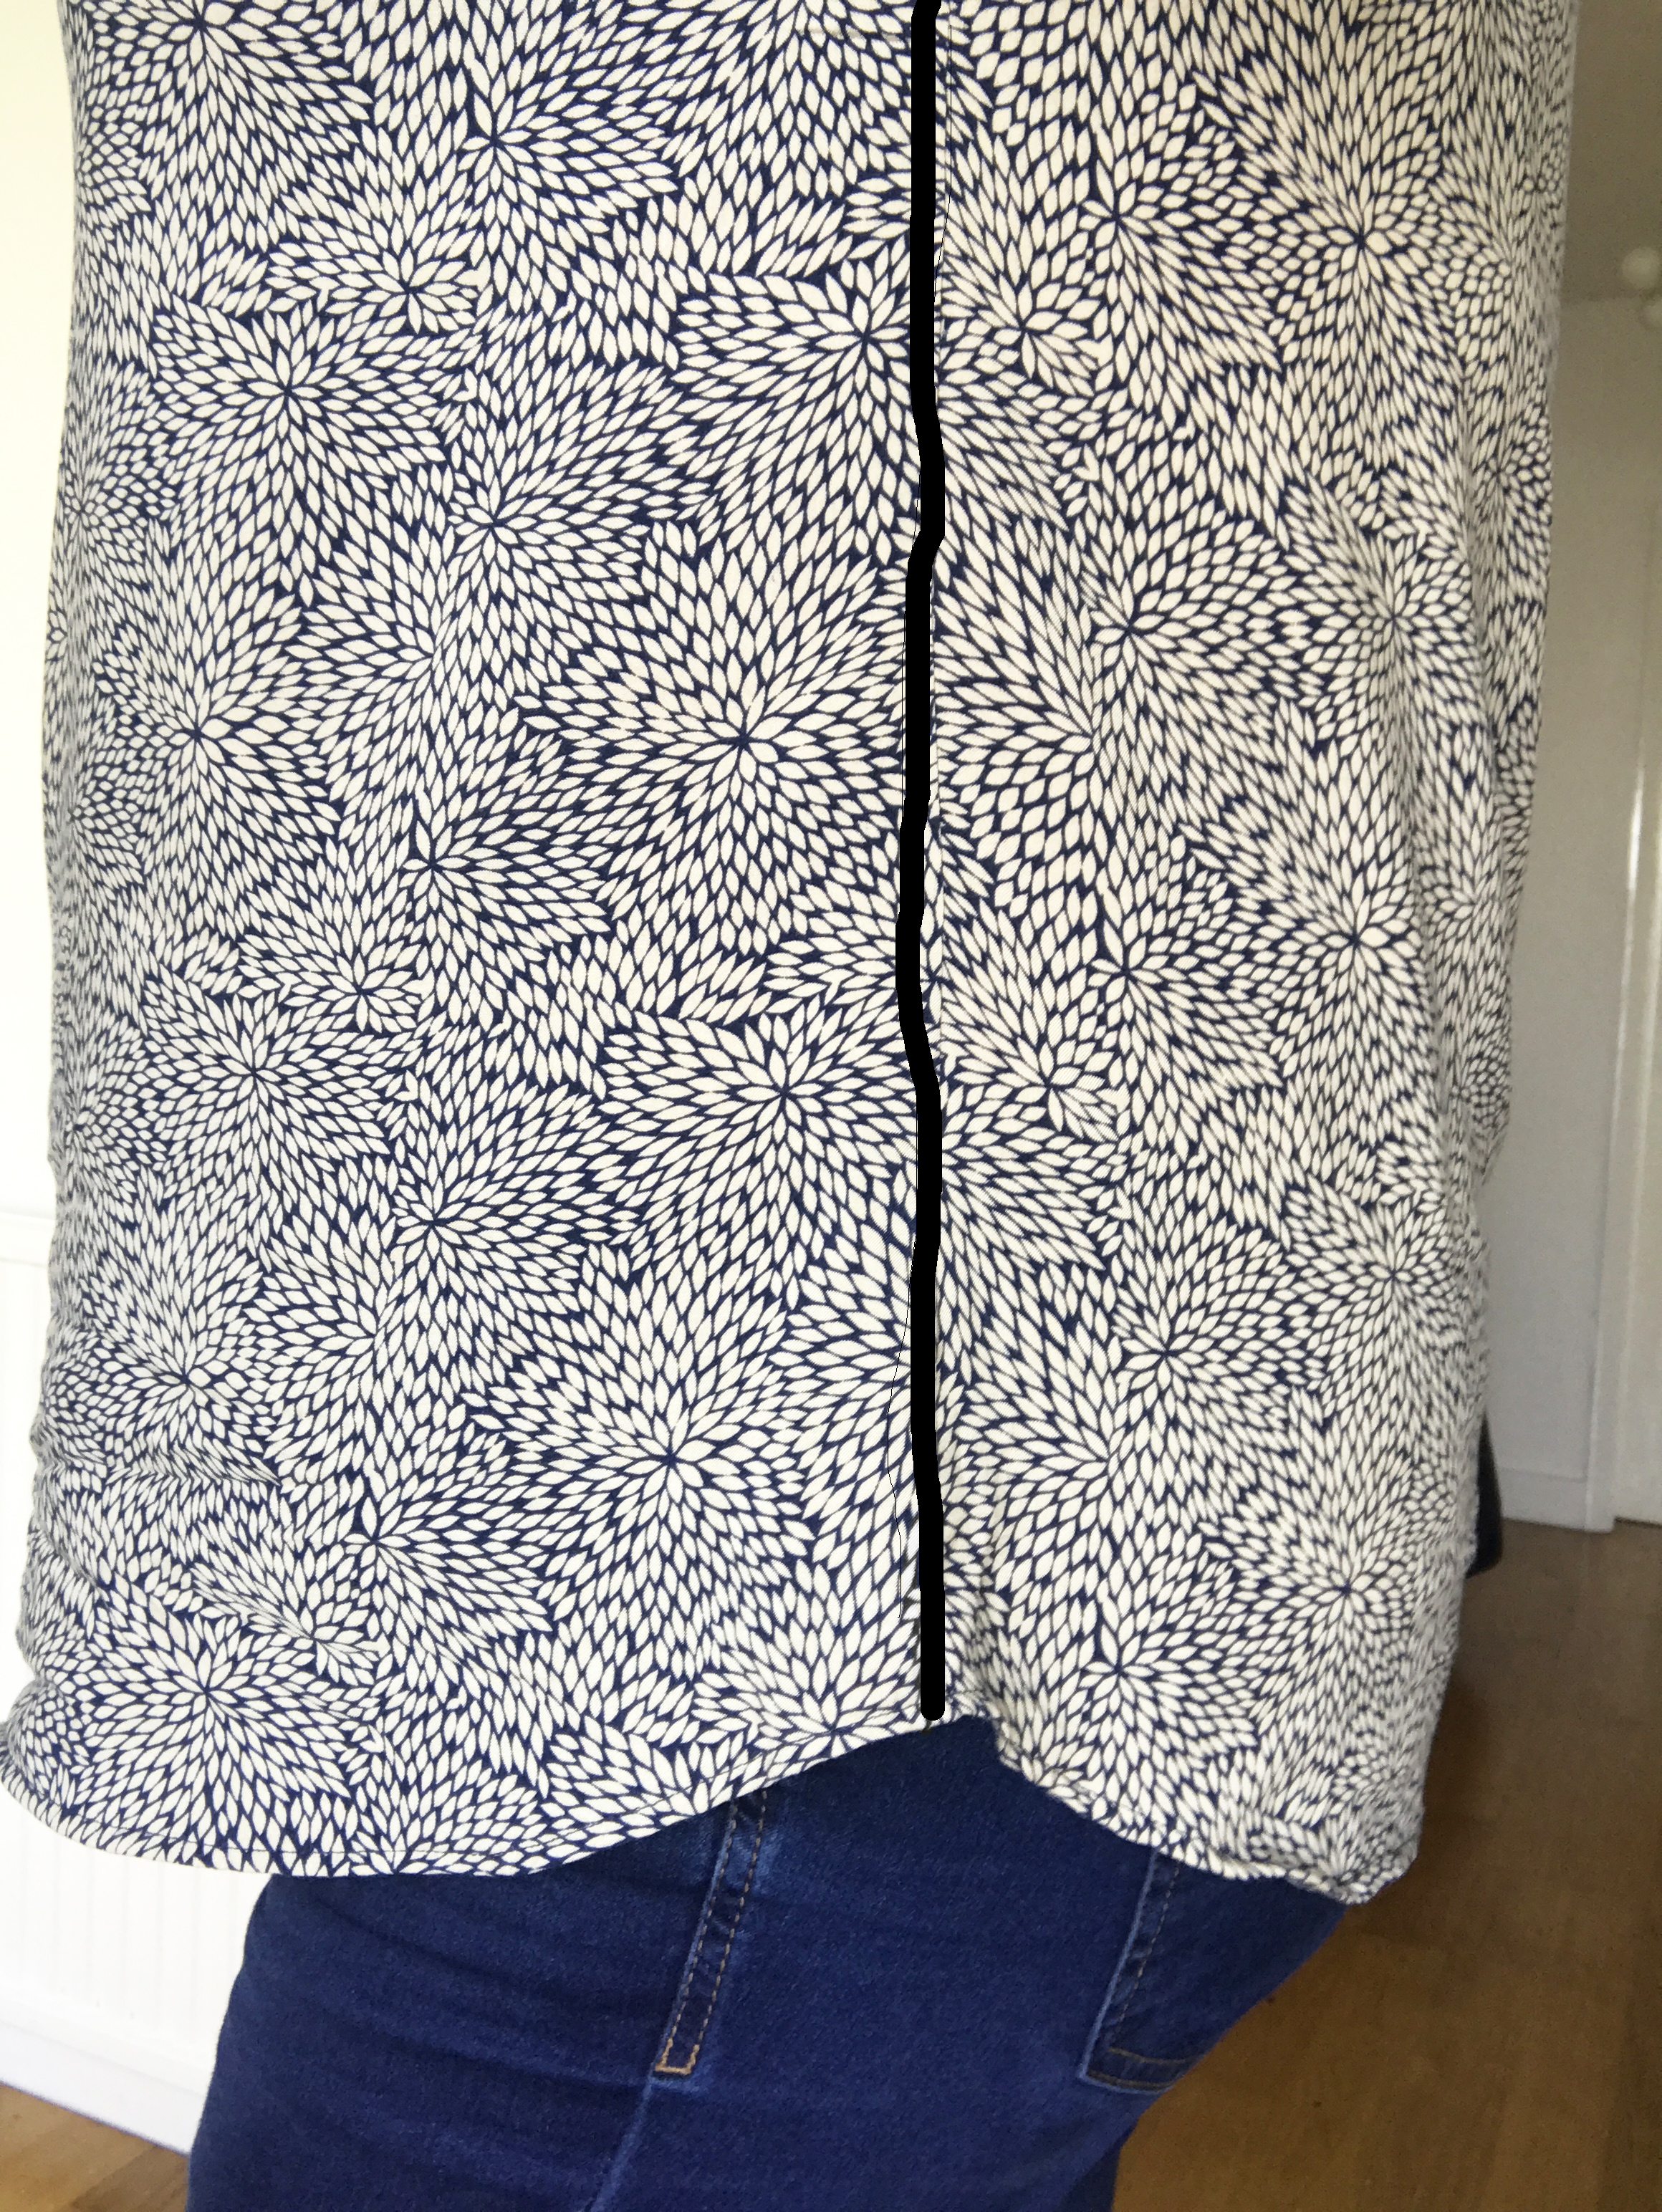
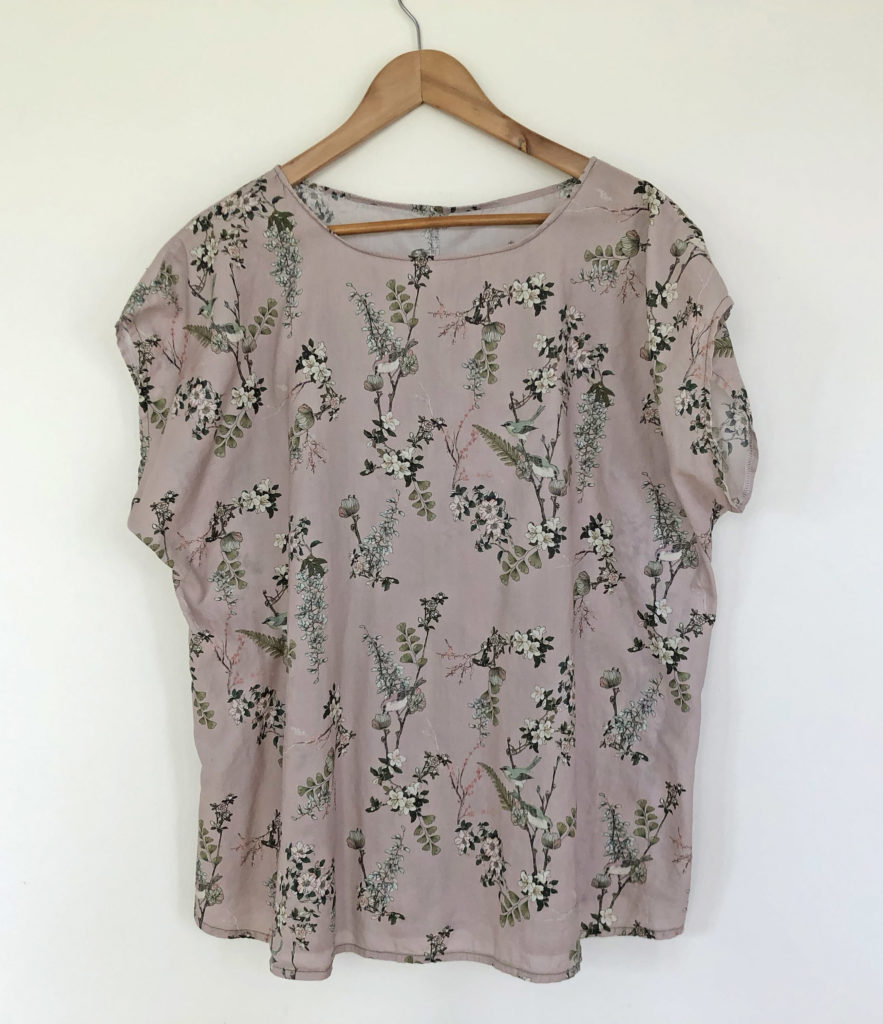
The fabric is from the wonderful Stone Fabrics in Devon.  I bought this on holiday a couple of years ago, so again it’s good to get it out of the stash.  I’ve checked their site and the don’t seem to have any of it left.  Which is a shame because the fabric is beautiful, and the print is lovely.

Unfortunately I look like an extra from the Walking Dead in it.  It’s a really bad colour on me.

And finally is this lovely blue print.

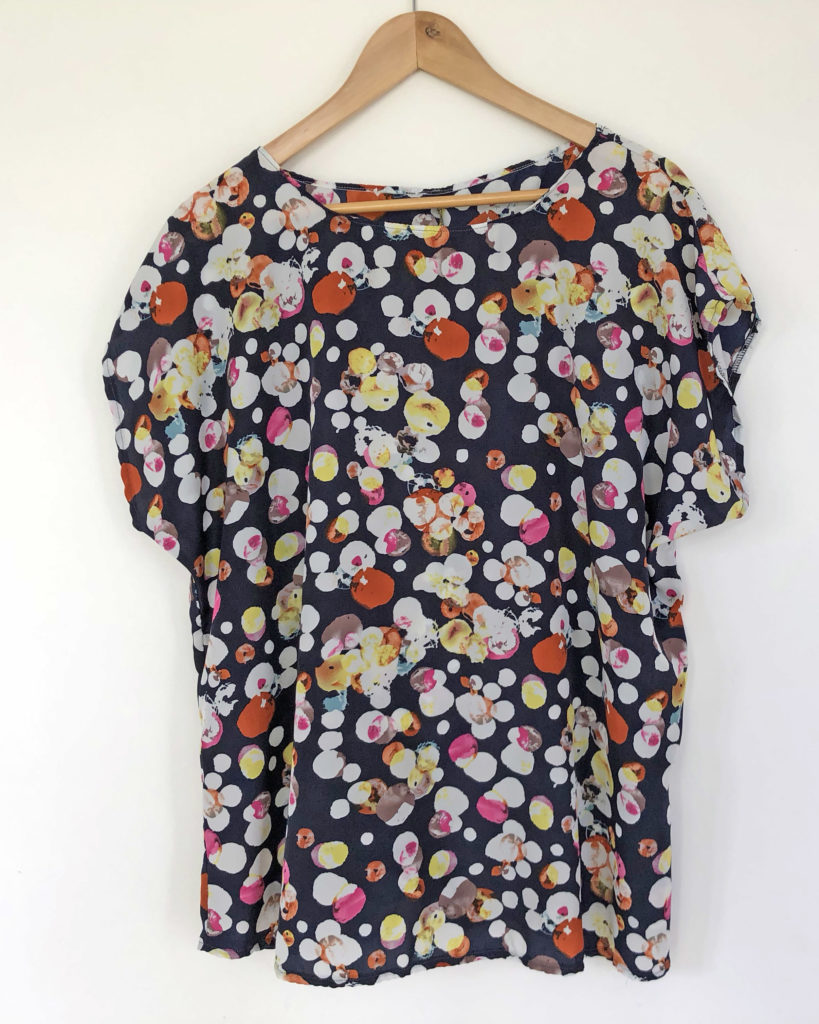
Which is all the colours that look amazing on me.  But the fabric (a bargain bin purchase from Abakhan for very little money) is awful.  And clingy.  And just plan old nasty.

So I can happily say I’ve now got my first TNT pattern.  It’s such a useful little top I’m sure to make more.  However, on the sewing table at the moment is a Harris Tweed waistcoat for Dave, and the Imogen top in its second iteration with an FBA.  As the kids are back at school next week, I’m hoping to get some sewing done on both of them.

LABELS ~ Sewing

SHARE >>

Sew Me Something Imogen Top – wearable toile

March 5, 2018

The Sew Me Something Imogen Top has been on my sewing list for what seems like forever.  And as I’ve a few lengths of pretty prints in my stash that are perfect for this top, I decided to make a quick toile to see what it looks like and fits like.

Fit is still a massive challenge to me, but for this top I decided to compare the measurements to a RTW blouse that gets heavy rotation.  Although the fit on the RTW blouse isn’t perfect, it’s still good enough, and it’s one of my favourite wears.

Taking some measurements from the RTW blouse, I decided to cut a straight size 20 and added 4″ to the length.  I’ve made no other adjustments to the pattern.

As you can see, it’s come up a bit long.  I will go back at some point and chop probably a couple of inches off the length.  That’s an easy enough fix and due to me being overly cautious – you can always shorten but it’s tough to add length once you’ve cut.

The bust is the problem area.  You can see drag lines pointing clearly to the bust, indicating that although, theoretically, this top fits around the circumference, it does need a full bust adjustment (FBA) to make it hang nicely.

I like the gathered neckline and elasticated cuff.

All in all, I really like this top.  It’s an easy wear and, although it’s been very shoddily sewn, as it was intended only to be a toile, it’s had several outings and a compliment every time it’s worn.

Construction wise, it’s simple enough, apart from the placket.  I couldn’t get my head around the instructions, but that could just be user error.  I’ll let you know the next time I make it.

For the next iteration, I’ll go do an FBA and the shorter length, and see what I end up with.  If it’s half as wearable as this toile version, then I’ll be a happy sewist!

Project notes

Pattern: Sew Me Something Imogen
Pattern cost: £16.00 (£9.00)
Fabric:    Blue print poly
Purchased at: Birmingham Market
Fabric Cost: £3.00 ish.  Not very much at all.
Photographs by Miss S. Jones iPhone 8

LABELS ~ Sewing

SHARE >>

Newlook 6217 – version 2

October 7, 2017

One of the things that’s been missing in my life for many years is the time to regularly sew for myself. This isn’t a bad thing.  It’s just that life has been full of too many other things to allow me the time and brain space to as creative with fabric as I’d like.

But as the kids get older, and I shed obligations that no longer work with our life, I’m hoping to change the sewing situation.

I’ll have to admit that there’s one other thing that’s kept me from sewing quite as much as I’d like, and that is fit.

I’m have not yet mastered fitting myself.  This isn’t just down to time, I think it’s also due to my ridiculously fluctuating weight over the past few years.  I think I just have to acknowledge that this may continue for a while and embrace the need to carry out alterations or pass clothes on.

It became very clear to me recently in my adventures with Newlook 6217 that I still don’t have a clear plan of what I need to do to a pattern to get a half decent fit without multiple toiles.

This top is so, so simple to make.  Two pieces. Four seams. Five hems.  Nothing to it.

But as with all simple garments, fit is key as it has nowhere to hide.

My original unblogged version of this had been worn to rags, but had needed a little more room in the bust and a little less in the neck.  It had also needed the shoulder and side seams shifting.

So I carried out the changes (thankfully I’d noted these down!) and now have the side seam exactly where I want it.  The black line helps you see it, as it’s well hidden in the fabric pattern.  I know it looks odd but that’s due to me carrying all my excess weight to my front.

It does look like I need a small sway back adjustment in the photo, but I’m sure that’s the way I’m holding my arm up to take an iPhone photo.  I’m going to monitor that situation with future makes as in real life it doesn’t look as pronounced.

So I’m happy with that.

Having moved the shoulders, I’m still not happy.

The seam is still rolling to the front.  I have appalling posture.  Thank goodness I’ve got a yoga teacher coming next week!

Ok…on a top like this it’s easy to adjust the shoulder, so, I’ve done another seam adjustment for the next iteration.

I added another 1″ to the FBA.  I didn’t want to add a dart to this top so I followed the instructions for the Y-shaped FBA in Fit for Real People: Sew Great Clothes Using ANY Pattern.  I removed the sleeve portion of the pattern before doing the alteration and it worked a treat.

As I’ve added a significant FBA to this top (a total of 6″), I’ve got some pooling above the bust.

I’ve pinched this out into wee darts to make this top wearable, and I’ve transferred this to the pattern.

I promise I’ve sewn them more evenly!

This second iteration is still very wearable.

Even with the fit flaws its still better than anything that I would buy off the shelf.  And because of the FBA it fits around the bust but flatters across the tummy, rather than having too much fabric swimming about there.

The other joy is having a top that fits at hip level and actually covers the bits I want it to.  At 5ft 7ins I have such trouble with RTW tops hitting too high and rising up in wear.  This doesn’t do that!

I have another version cut out and ready to sew.  It’s a knit fabric this time, which is really not the greatest idea when you’re perfecting fit, but was top of the fabric tub.  I’ve also got another length of fabric washed and ready to go which will, hopefully, be the last wearable muslin to get me to my first Tried And Tested pattern.

Project notes

Pattern:                                                                    Newlook 6217

Fabric:                                                                     Soft cotton lawn.

Colourway:                                                             Navy/taupe

Purchased from:                                                     Preston market

Total  cost:                                                               £4

Similar fabric can be found here:                        Croft Mill Fabrics*

*This is more spendy!

Please note that some of the links in this post are affiliate links.  If you click through and make a  purchase, I may receive a small commission, at no cost to you!  I only recommend goods or services that I am happy to use myself.


LABELS ~ Sewing

SHARE >>

Burda 6985 – a very wearable muslin

May 15, 2016

I’ve made a start on the first of my planned TNT patterns, which is this BurdaStyle slim legged trouser.

6985-front-envelope

The fabric I used is a 100% polyester crepe from Abakhan.  I’m slowly edging away from polyester, but I’d booked myself onto a Sewing for Fun day at Stitchscape with Celia Banks, and new this was one of the patterns I wanted to work on.

I’d already cut them in a cotton drill but when I’d tacked them together for fitting it was really obvious there was a problem. It turns out the fabric was completely twisted on the grain. So I needed a replacement fabric.  And fast.

It had to be navy and this was it!

Whilst it was a bugger to sew, it drapes really nicely and worked well in a pinch for the sewing class.

Burda_6985_1

For the purposes of fitting, I cut without pockets or fly zip and did an invisible zip in the back seam. This isn’t my favourite style of trouser but I believe it’s a great way to simplify the pattern and work on the fit.

Burda_6985_2

Ah…the obligatory derriere shot!

This clearly shows how flat I am at the back.  I’m straight up and down with no waist or hips to speak of.  This is one of the reasons I have such issues with RTW.

But I’m really happy with the fit at the back. I’m not sure I could get it much better than that.

The front is pretty good too.

Burda_6985_4

All in all I’m quite pleased with these.

Burda_6985_3

I think with a couple of tweaks they’ll be spot on.  I definitely need to take the waist in at least 1/2″, maybe as much as 1″.

I also think that I need to drop the waistline by about 1/4 – 1/2″.

And I may scoop that front curve just a smidge too.

Finally, I’d like the leg to be slightly slimmer, as the next pair I make will be the 7/8ths length shown on the pattern and I like a more slender leg for that style of trouser.

But…these are a great pair of smart trousers and a very wearable toile!  I’d definitely wear them for formal meetings (although those are few and far between) or, more likely, with a pretty top and my wedding heels (as here) for dinner out with the husband.

Now if only he’d book the table…..

LABELS ~ Uncategorized

SHARE >>

CustomFit by Amy Herzog – a review

August 13, 2014

The plasterers are plastering.

The kids are thankfully at a playscheme every day and grandparents for tea each evening (thank you grandparents…yet again I couldn’t do this without you!).

I am slowly losing the will with the mess, but have my eye on the prize and am going shopping for a new fireplace and possibly doors at the weekend.

All that aside, I finally have Aislinn blocking…I’m hoping she’ll be dry for the weekend, but it’s awfully soggy here at the moment, so it’s taking time. Whilst we wait for that I thought it might be a good idea to share my thoughts about the whole CustomFit experience.

customfit


I know that many folks have pondered whether the system works or not, and, in fact, HOW the whole thing works.  So here we go…I’ll try to explain.

What is CustomFit?

For those of you that haven’t come across CustomFit yet, Amy describes it as:

“CustomFit is a web application that will produce bottom-up sweater patterns tailored to your body’s measurements. That means: You put in your body measurements (just once) and knit a swatch (at least once). When you’re ready to create a sweater, decide what kind of fit you want (close, average, or relaxed), and either choose one of our “CustomFit Classics” or create an entirely new design. Select the body and swatch the design is for, and easy as that, you have a pattern!”

Sounds really straightforward, no? There has, however, been much confusion over some of the terminology. So, to clarify, here’s what you need to do:

How do I create my CustomFit version of one of Amy’s designs?

1) Decide which pattern you want to knit.  I’m assuming at this point it’s going to be one of Amy’s patterns.  If not, I’ll come back to that a wee bit later.

2) Log on to the CustomFit website and put in all the measurements listed.  Yes this takes a bit of time, but it’s most definitely worth it. And you only have to do it once!

3)  Next, you need to do the swatching.  I know, I know…but I’m totally converted to swatching after watching Amy’s Craftsy course.  I make bigger swatches and do different needle sizes to ensure that not only is the fabric coming up to the required tension (gauge), but also I like the fabric it’s creating.  Because if I don’t, now is the time to do something about it, not 3 months down the line when I’ve completed the garment.  Ask me how I know!

4) By now you’re ready to start building your customised knitting instructions for the design of your choice, so click on the design button on the home page.  Some of Amy’s patterns are already ready to go…you just need to follow the instructions on the page.  You’ll only need to add a few details and your customised pattern will be ready to print.

5) For the other patterns in the range you’ll need to buy the CustomFit recipe, which will give you all the information you need to complete the design process and produce your customised pattern.

Whichever way you go the process is really straightforward once you actually start popping numbers into the system.  I think the problem has been that this is a completely new way of purchasing knitting patterns, and as such has potentially confusing new terminology.

What if I want to use another designer’s design?

Good question!

My understanding is that Amy is hoping to encourage other designers to produce CustomFit recipes in the future.  Until then I would suppose that you can use the “Classic Silhouettes” or “Build Your Own From Scratch” functions to create a set of knitting instructions that would give you the basic shaping onto which you could superimpose the pattern from your chosen designer.

For example…

I’ve got my eye on Kate Davies’ Catkin sweater:

catkinthreequarter_medium2

I could make a CustomFit pattern using the Scoop Neck Pullover template

scoop-pulli

and then use Kate’s Pattern for the rib lengths and cable design.

Does that make sense?

Isn’t it an awfully bloody expensive way to buy a knitting pattern?

Another really good question…to which my answer is “yes” and “no”.

Yes…

Amy’s standard knitting patterns are $7.00 each.  A CustomFit pattern + CustomFit Recipe is $12.50.

That’s a 75% increase in the cost of the pattern, which is a pretty hefty number if you’re just looking at numbers.

However….

  1. You don’t have to do any knitting math.
  2. If you’re anything like me you’re going to spend quite a bit of your life knitting this garment…you want it to fit at the end of it.
  3. You don’t have to do the math…I’d sell my wallpaper scraping mother to avoid having to do knitting math!
  4. Even at $12.50 it’s comparable to an Indie sewing pattern, and you’d still have to do the fitting on the sewing pattern!
  5. Did I mention the math…or lack of it?

For me, that extra $5.50 (which, FYI, is roughly equivalent to one large Frappuccino Light) is money very, very well spent that saves me much head scratching and cussing, and let’s me get to the fun bit, the knitting, as quickly as possible.

Obviously, the key question is…

Did it work and does it fit?

Yes (bar two minor hiccups) and yes!

Minor hiccup number one was setting the lace pattern on the front.  It took full consultation of my knitterly friends over coffee and cake to resolve it, so I’m putting that one down to instructions that could have done with a little more clarity.  That said, it wasn’t an insurmountable problem, just potato/potahto!

Hiccup number two was entirely down to me.  I merrily input my measurements into the programme, cast on and knit away on the back of the cardigan, only to realise that I’d actually put two much length into the mix and the finished garment wouldn’t look how I wanted it to look in the end.

So I ripped it back a bit and made a quick adjustment (that even my math phobic brain could deal with because the CustomFit pattern not only gives you the length of the bit your currently knitting (eg back length…knit until work measures X”) but also the number of rows (eg back length….knit X rows).  I can most assuredly count rows and jot them down on a piece of paper!

The key thing is that pre-blocking, I tried the Aislinn cardigan on and she fits like a dream.

Assuming I’ve not buggered that up with the blocking, you’ll be able to see the finished thing very soon and judge for yourself?

Would you use CustomFit again?

Absolutely!  I’m of too Yarndale in September and am planning to purchase yarn for a couple of Amy’s designs, yet to be decided, to keep me in stitches over the winter months.

Things to bear in mind

At the moment CustomFit only does women’s patterns and designs that are knit flat and seamed.  It’s my understanding that at some point an option to create men’s patterns will be introduced, and also designs knitted in the round…but I don’t have any more information on that at the moment.  It’s just a case of “watch this space”, I think.

Cue another “thank you”…this time to Liz who whipped my knitted pieces away and in the blink of an eye had them seamed up into a cardigan with the most beautiful and invisible mattress stitch.

Unexpected upside!

Astonishingly, and unexpectedly, the success of this pattern has made me even more keen to get to grips with fitting knits (which dovetails nicely with the work I’m currently doing on upping my sewing fitting skills).  Whilst my next couple of knits will definitely be Amy’s designs, I’ve ordered a pile of books from the library to check out which I want to spend my cash on…all on the topic of fitting and altering knits.

Fitting is my new obsession, and I’m not remotely sorry! 😉

I do hope this all makes some sort of sense to you, and that it’s made the CustomFit offering a little more accessible, because I do think it’s a really great option to have available to us knitters. Please do leave a comment with any questions you might have.  I’m by no means an expert in this but I’ll do my best to answer.

In the spirit of full disclosure, I haven’t received any recompense or reward from Amy Herzog or her team in return for this review. In fact I actually bought the CustomFit recipe, CustomFit pattern, AND the standard pattern, thus paying completely over the odds, mainly because I’m an idiot!.  All opinions expressed in this article are entirely my own.

Images used throughout are shamelessly borrowed from Kate Davies Designs and CustomFit with much gratitude.

LABELS ~ Knitting

SHARE >>

Lekela blouse – pattern review and toile

March 24, 2014

Have you heard of Lekela patterns?

I’ve been aware of them for quite some time but I’ve never taken the plunge and tried them out. Originally their website was more than a little messy and their ordering system the same, and although I liked the look of some of their patterns, I really couldn’t be bothered faffing around with it all.

However they’ve recently upped their game and the site it much cleaner, more easily navigable, and the prices are super low.

I paid $2.69 for pattern 5098, which is this blouse pattern:

Blouse With Wide SleevesI chose this pattern because it’s very similar in style to a RTW blouse I’m wearing to death, that I’d like to replicate, and that I’d like to become part of my planned suite of Wardrobe Architect inspired TNT patterns.

And, frankly, at $2.69 I can afford to take a punt on this…other than a bit of time and some muslin fabric, I’ve nothing to lose.

Buying the pattern

Obviously it’s really easy to buy a PDF pattern.  5 minutes and the thing is in your inbox and waiting to be printed.

Lekela is that simple but you also get the opportunity to choose whether you’d like your pattern with or without seam allowances, which is pretty cool.  Also you get to input your own measurements so that the pattern can be adjusted accordingly.

In theory this is just bloody marvellous.  But don’t get all excited just yet…you’ll see why in a moment.

The PDF

As I’ve mentioned before, I really don’t mind the whole process of print/stick/trace that is your lot if you order a PDF pattern.  Even adult patterns.  I pour a glass of wine, arm myself with scissors, magic tape and a bit of space at the table and crack on. It’s especially fun if I’ve got episodes of The Archers to listen too.

So that’s what I did.

And I wished I’d had more wine.

I’ve had experience of poorly tiled PDFs before but nothing on this scale. Firstly there are only guidelines at the side margins to show where you need to trim the paper to fit together….nothing at the top or bottom margins.

Secondly there are no guide marks to show where the tiled pages should connect to the one next to it.  So you’re trying to match the actual cutting/sewing lines of the pattern piece.

That wouldn’t be so bad if they actually line up…but I had to do some serious jiggery pokery to make that happen.

I know you get what you pay for but, seriously, this was ridiculous.  If you were a newbie sewer, or new to the whole PDF malarky, this could really be problematic for you.

The instructions

Think Burda.  ‘Nuff said.

The Toile

Having thrown the pattern in the corner to teach it some manners, I came back to it refreshed the next day to cut and fit the toile.

This pattern should be used as a teaching tool in every sewing class to show the reason why you make a toile.

Here’s a spectacularly hideous photo of me wearing the toile cut straight from the pattern with no alterations.  Bear in mind that I input my measurements for this:

2014-03-20 17.43.46

It’s just awful.  It’s waaaaaaaaay to big,  I know I’m starting to lose weight but I’ve not lost that much overnight! (Oh, I wish!)  Also, the neckline doesn’t reflect the illustration, and overall it’s too long.

This is the second toile after some adjustments:

2014-03-20 17.41.45

Toiles are so flattering…but this is so much better…and I’ve tweaked the pattern a little more after looking at this picture.

My alterations:

  • Removed 2″ from the centre front and centre back.  I crossed checked this against the inspiration blouse and it was clear that all the excess fabric was in that area.
  • Widened the neckline, again using my RTW blouse to check the sizes.
  • Dropped the neckline by about an inch.
  • Lowered the bust dart by about 1/2 inch.
  • 1/2 inch forward shoulder adjustment.
  • Hollow chest adjustment
  • Rounded back adjustment
  • 1″ removed from the hem

The forward shoulder/rounded back/hollow chest adjustments are standard fare for me, but I’ll admit to being disappointed that, having given specific measurements, the overall size of this blouse was so far off the mark.

I didn’t fit the sleeve for this muslin as there is a lot of volume to allow for mobility and I’m really pleased with the fit of the armhole.  However I will ‘walk’ the armscye and sleeve head before I cut any fabric…just to be sure one will fit the other!

So…what do I think of Lekela patterns?

I think in principle this is a great idea.  The model for this website is obviously low price/high volume.  $2.69 is a ridiculously low price to pay for a sewing pattern, but they’ve cut right back on the instructions and everything is obviously generated by the software.  Once you’ve done the basic pattern in one size, and an illustration, I’m making a fairly educated guess that everything else is automated.

However, and it’s a big however, there are still a lot of kinks to iron out.  The fit is way off and the PDF tiling is atrocious…the worst I’ve ever experienced.

I wouldn’t recommend these for novice sewists, but if you’re comfortable hacking a pattern around to get the fit, then go for it.  These patterns cost less that a small takeaway coffee so it’s a tiny investment.

I’m hoping to get a sewing day tomorrow and start actually cutting out the fashion fabric.  I’ll be using a super cheap, but really pretty poly from Abakhan for this pattern’s first proper outing.  I’ll let you know how I get on.

Wish me luck!

ps…please ignore the absolute tip that is the sewing loft at the moment.  We keep saying “let’s go and finish packing the loft up” and then settling down with a glass of wine and a movie.  It’s just such a miserable job that The Husband would rather lift tiled floors than do it, and I need him to dismantle the heavy stuff before I can do any more.  So it sits, like an albatross atop the house. And we drink wine and ignore it!

LABELS ~ Uncategorized

SHARE >>
  • 1
  • 2
  • Next Page »

Welcome

Image of a woman in her fifties taken from the shoulders up. She has grey shoulder length hair, brown eyes and a soft smile.

Hi there,
I'm Evie and I knit, stitch, spin and sew.
With varying degrees of success!
But always with my family around me in our little town in the North of England.
Grab a brew and stay a while.

LET’S GET SOCIAL

  • Instagram

LOOKING FOR SOMETHING

JOIN THE LIST

Enter your email address to subscribe to this blog and receive notifications of new posts in your inbox.

ARCHIVES

POPULAR POSTS

Aislinn – the finished garment and a giveaway!

Simplicity 1886 – FO 18/2013 – review and a splendid Simplicity pattern giveaway

The skirt is nearly done!

BurdaStyle 130 – blue silk prom gown

Pavlova out-of-the-envelope – FO 14/2013

DISCLOSURE POLICY

Occasionally I’ll include affiliate links in my posts.   If you click through and make a  purchase, I may receive a small commission, at no cost to you!  As you’d expect, I only recommend goods or services that I think are awesome and worth sharing.

COPYRIGHT NOTICE

© COPYRIGHT PURLANDSEAM

THEME BY ECLAIR DESIGNS