It’s strange days, my lovelies. I hope you’re all staying in if you can and staying safe regardless.
We are on lockdown here Chez Jones. Dave is working at home. The kids have online schoolwork. We’re not doing masses of it, with school’s blessing, but we have what we need. They also have enough Lego to build a nuclear bunker, books to stock a small shop and are showing an interest in learning calligraphy.
I think you can say we’re going to be fine. We have much to be grateful for.
Although I don’t mind admitting that I’m equal parts heartbroken and humbled by humanity at the moment. There has been a definite split in the behaviour of people up to this point. I’m not on the side of the self-centred hoarders of pasta and loo rolls.
Thankfully, before all this malarky started, I was able to attend my second furniture painting workshop. For this one we were looking at layering stamps and transfers.
We arrived to find that the store owner, Amanda, had prepared some colour blended boards for us. Therefore, our first task was the fun one of choosing our stamps.

These are just clear plastic stamps. You use ink from ink-pads in whichever colour you chose. They are super easy to apply. However the stamps are very detailed and do all the work for you.

To enable you to layer stamps and add dimension to your design, you print the surplus ink onto paper, cut around the design and use it to mask the printed design on the board.

You can then print over the mask to create depth and interest without the colours and design becoming muddied. It’s a really clever technique that is easy to do.

Once all the stamps are in place (or most of them…it’s easy to go back and add more later if you want), it’s time to choose your transfers.
These look super complex because there is so much detail in them, and if you remember the sideboard from my last post, they can also be very large and multicoloured. We kept it small and simple for our first attempt.
However, I remember these transfers from school. Back in the day they were much simpler…I used alphabets on school books all the time! But the premise is the same.
- choose your design
- decide on where it’s going to go on your piece
- remove the backing and press into place where you want it
- rub off using the stick provided and lifting the plastic away as you to ensure everything is sticking.
You’ll see what I mean below. We snapped me in action on our second piece.

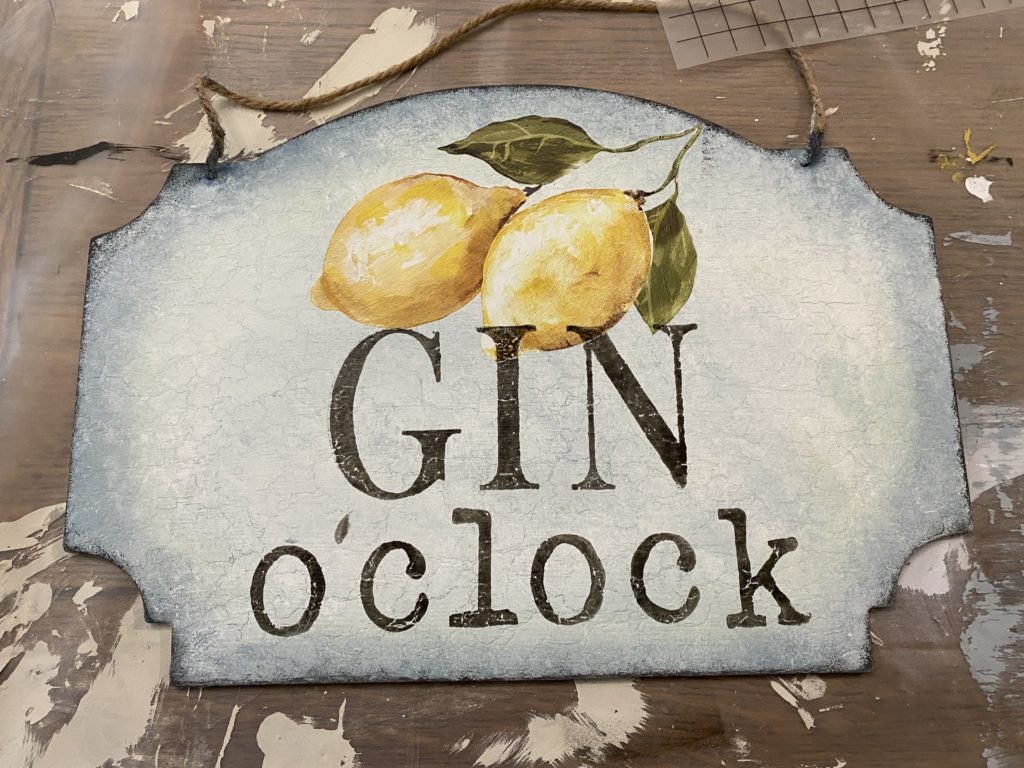
This is the finished first piece. I’m very pleased with it.
Whilst it doesn’t really go with my interior decor, I’m planning to seal it completely and theres a bare spot on a wall in the garden that will be perfect for it. Flanked by plant pots I think it’s going to be lovely.

This second piece utilised a bigger transfer and was good practice for using the larger designs. This shows how it’s done. It’s really simple. Just take your time and make sure all of the design is stuck before completely pulling away the plastic.

Also, your hands hurt like hell!
But it’s worth it.
There is another corner of our garden where we’re planning to put a tiny table and chairs for summer evenings. This will hang there…it’s always gin o’clock somewhere in the world!
Im hooked on this now. Sadly my other pieces will need to wait until Covid-19 is under control as my garage is unusable at the moment. But once we can empty it, expect to see more pieces cropping up here.
Thanks for reminding us that there is another life. I went to the cinema three times in the first week of March – it seems a century ago.
It seems so long ago since we were out in the world. I hope you’re finding a new rhythm to your days. We’re not quite there yet but thats mainly because the kids are finding the adjustment tough. We’ll get there.
These look lovely and will look perfect in the garden. What sort of designs have you in mind to go with your interior decor though?
I’m planning to paint them the same Whitey White. I have a vintage Jones treadle sewing machine that was a wedding gift (our surname being Jones, of course). The casing needs a bit of repair, then it will be white with a custom stencil celebrating our wedding date. I’ve got a vintage sewing box that will be white with a stencil on top and a new fabric lining inside. And I’ve just ordered a shipment of black exterior paint to get all my garden furniture painted and ready to use this summer.
I’ve a couple of other pieces that are undecided at the moment but I’m sure inspiration will strike!